for Cadet Force animations . . . latest.
Video showing three approaches to obtaining rotating wheel on a vehicle. Advantages and disadvantages of each are described below. It is clear that we could use CAD instead but that is not justified for the current project and also is not in keeping with other methods upon which ‘Cadet Force’ is based. It is highly unlikely that we will shift to any form of CAD for our projects.
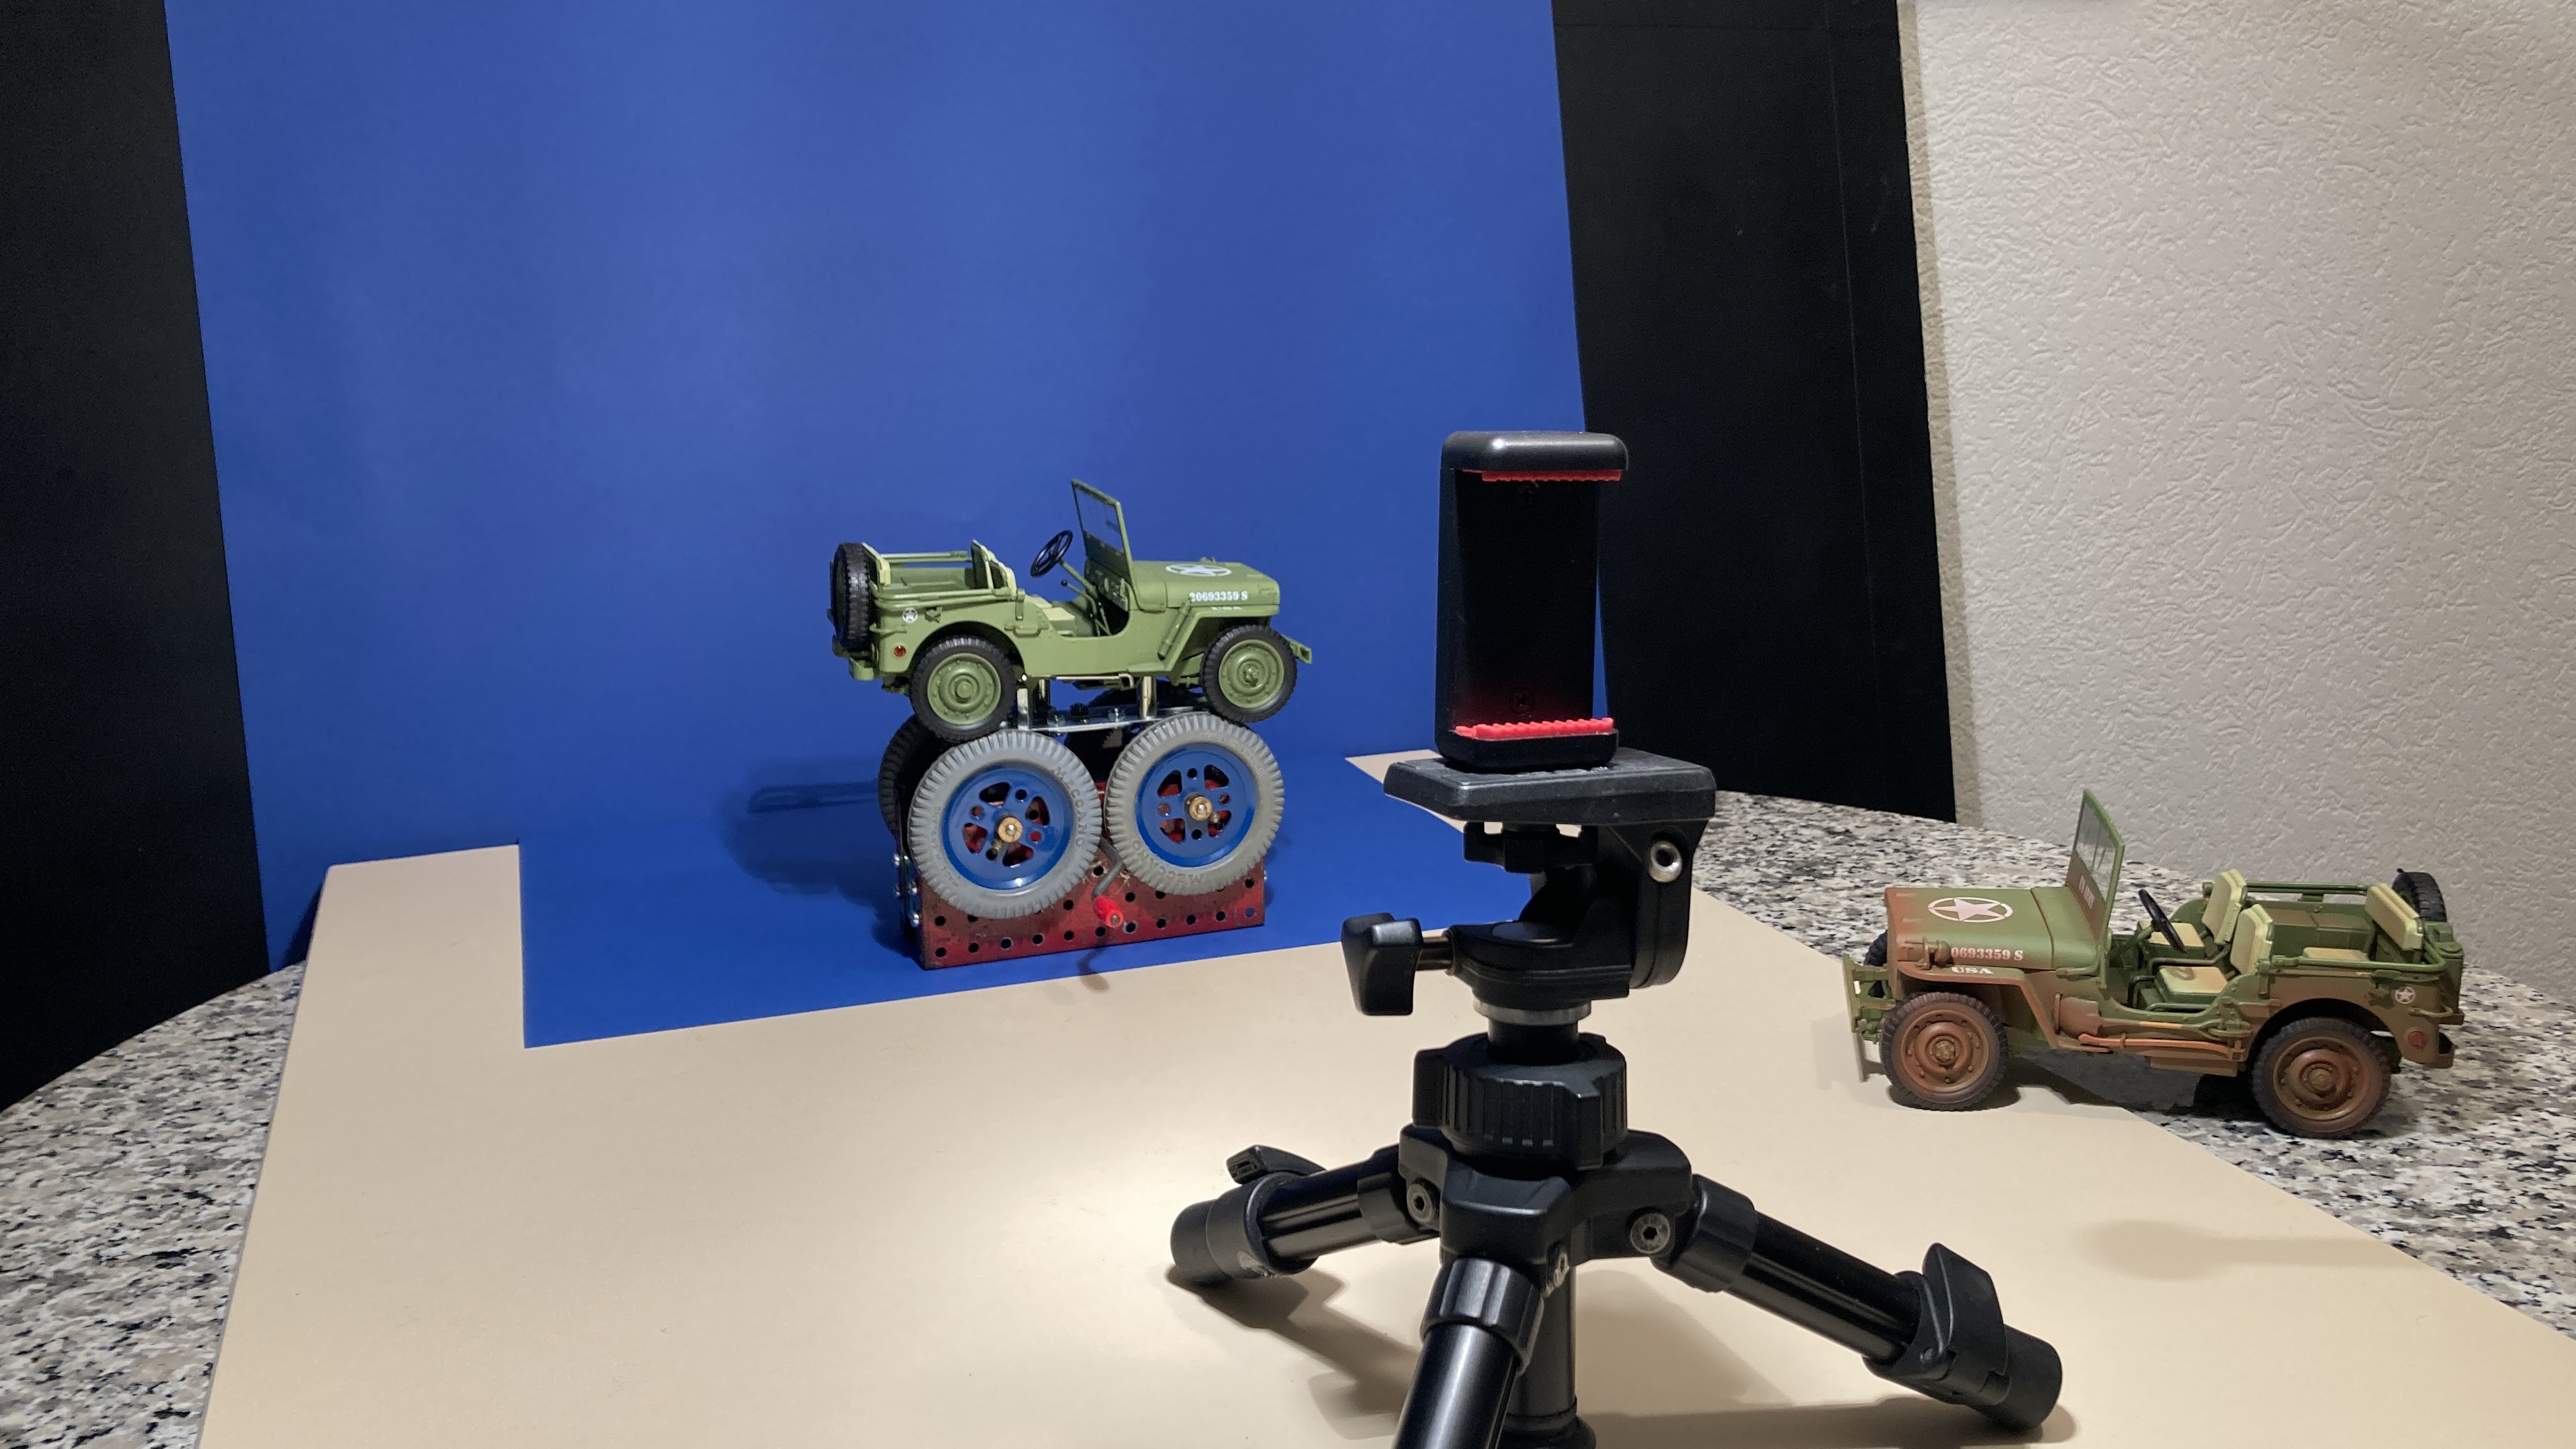
Note: All methods use the wheel-rotation jig so that all wheels rotate and filming can be from any angle. Also all methods use colour screen keying: method one for everything, method two for taking a screenshot which will be used for cutting out in Photo Shop, at the correct angle corresponding to the video wheel shots.
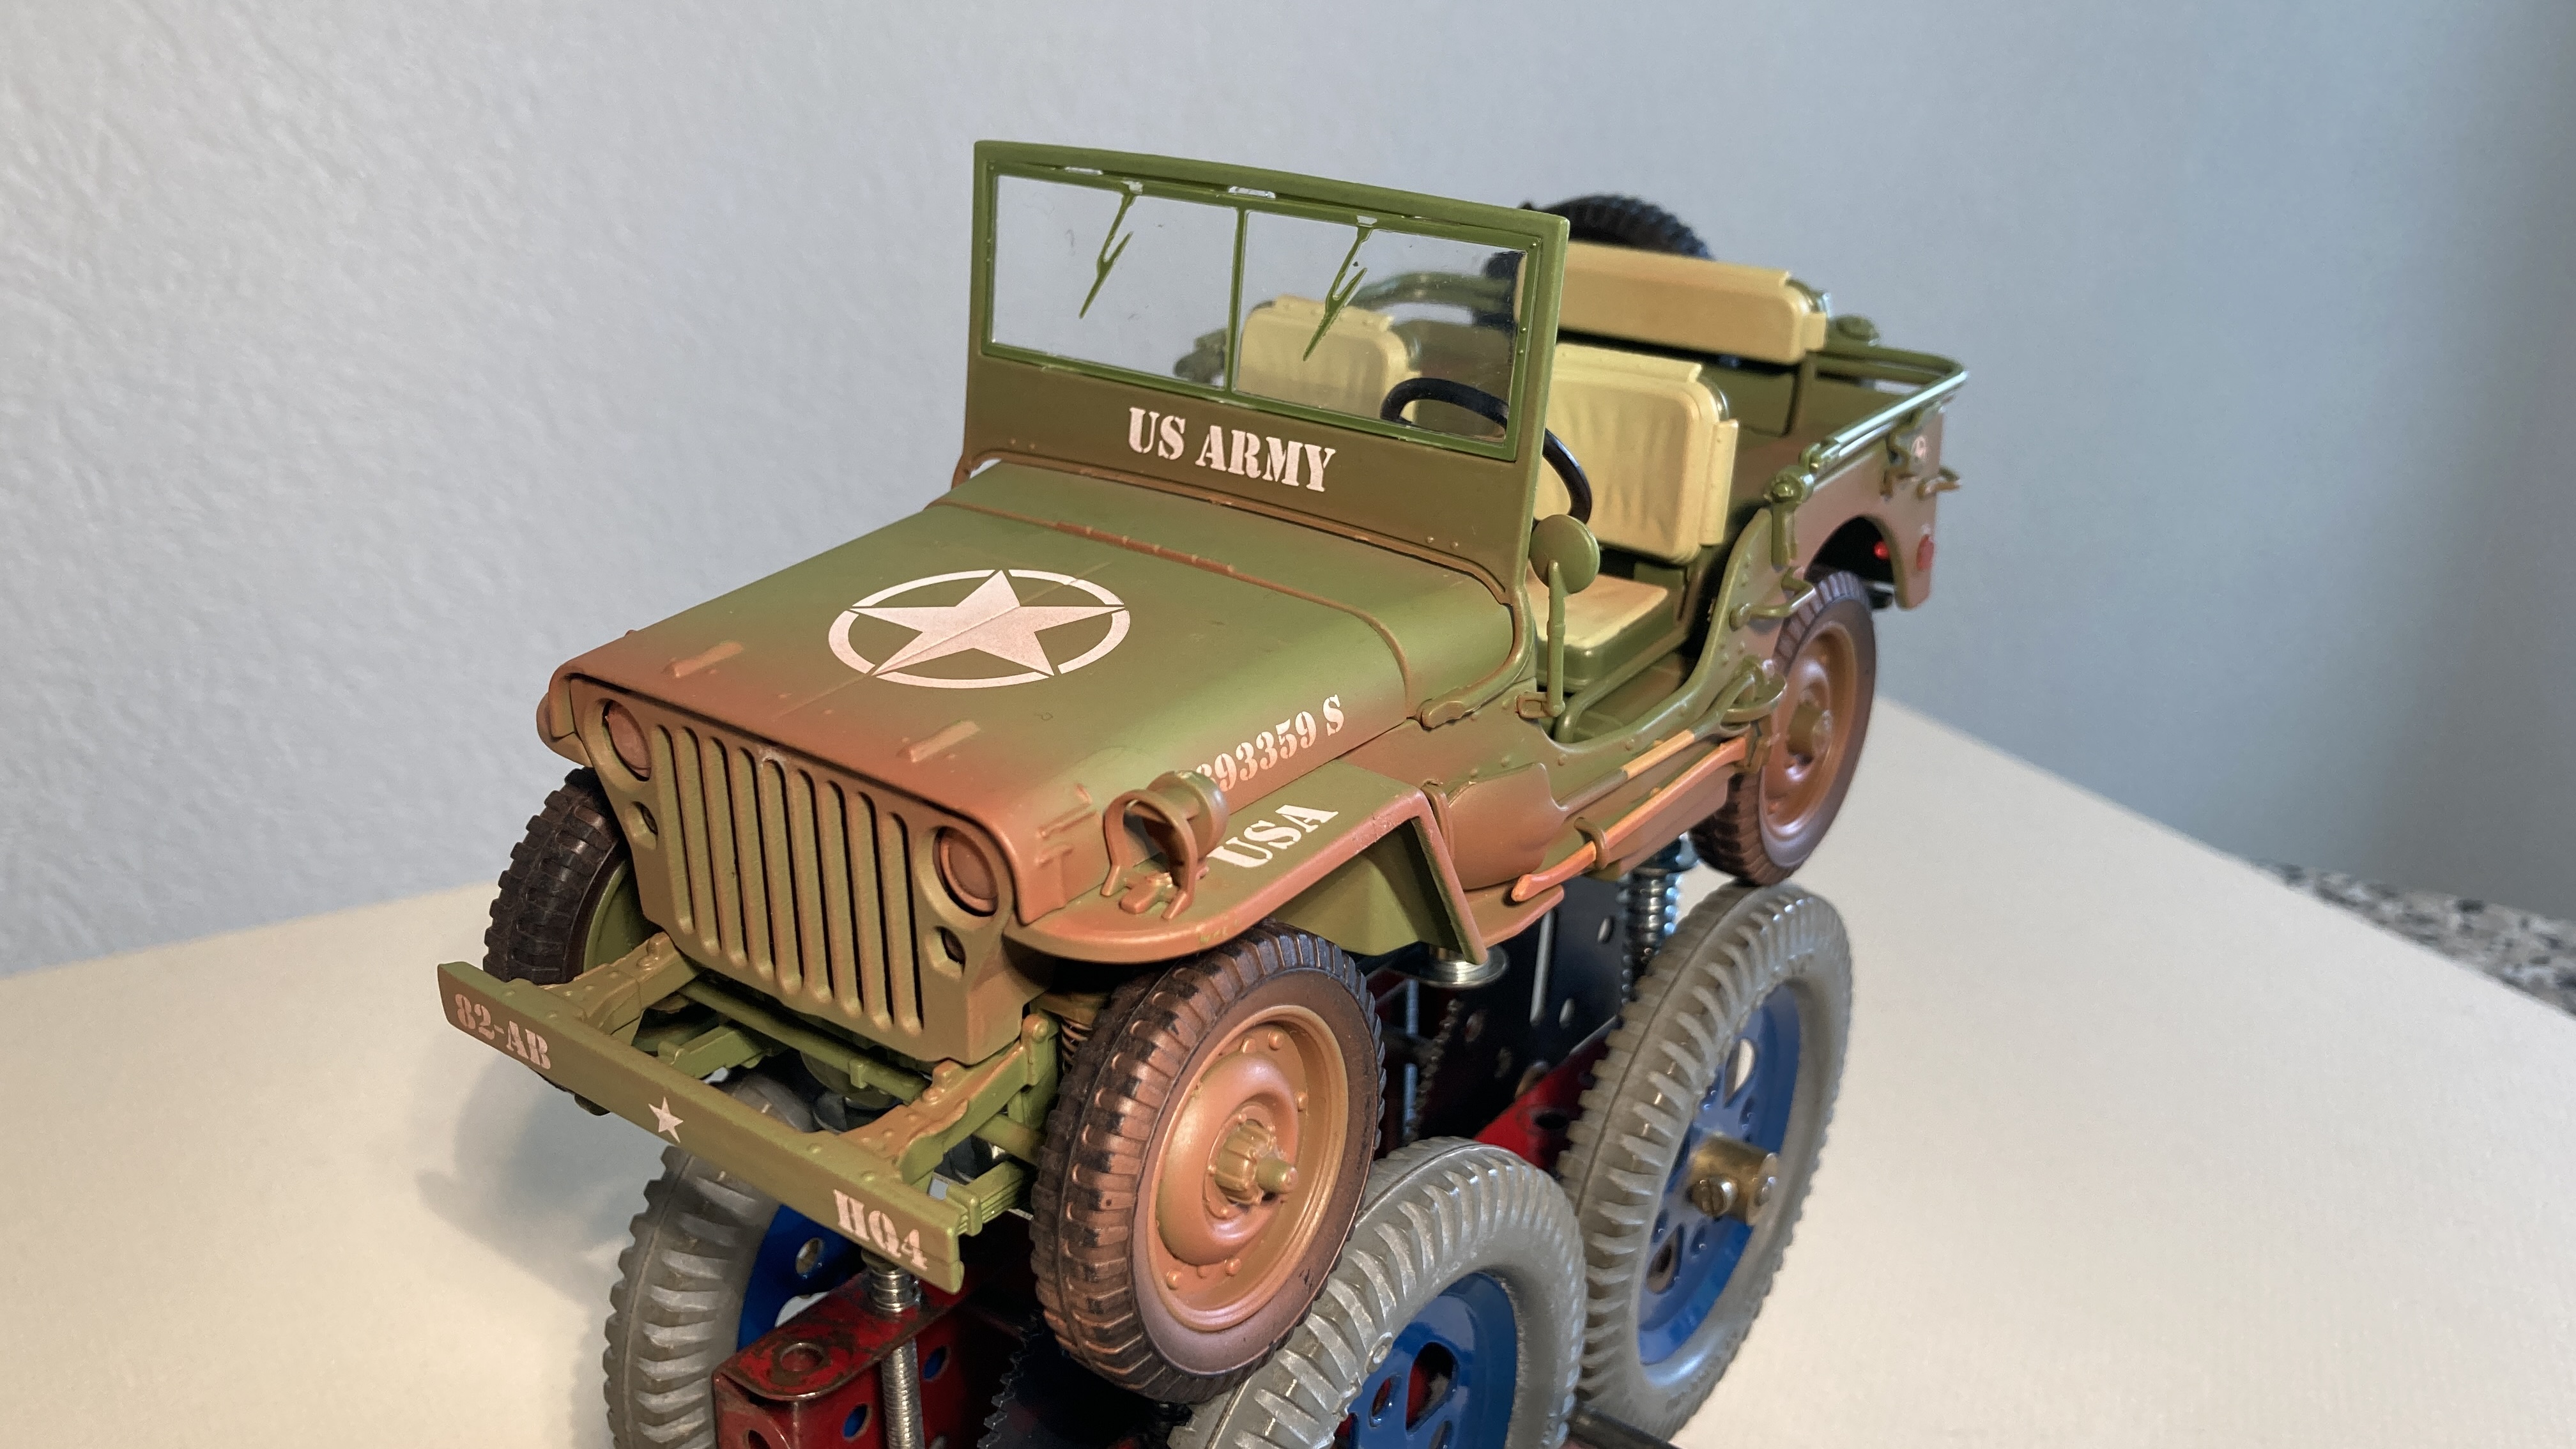
Method one: Maintains the Jeep body and the wheels together. Only the driver needs to be added to the final video. If we can obtain a good Cadet driver 1:18 scale model, then this method covers everything – no separation, no complication in the final stages.
Method 1 does require that the whole vehicle video, complete with all of its rotating wheels, be chroma-keyed thus presenting all of the traditional complications of colour and adjustments. Once the chroma keying is done (the filming can be done at any angle and of course also moving the camera around the vehicle) then the only masking left to do is to eliminate the wheel-rotation jig image below the vehicle and its wheels. This is done easily by a single video mask.
Method two: Maintains the Jeep body and the driver together, they are both cut out individually in Photo Shop and merged into a common image. Complication to method two is that the rotating wheels need to be video stacked on the final video. More visible wheels (depending on the angle) creates more complicated final editing to have everything moving in synchronization.
Method 2 has the advantage that a photo-shop cut-out can be more precise than a chroma-keyed version. However, the fact that each visible wheel needs to be isolated as well, meaning using video masking which is quite delicate and not always “clean”. Putting all the pieces together with this method in the final video (body cut-out, plus each wheel) makes for a difficult assembly. When animating the vehicle along a horizontal and vertical plane, it is necessary to ensure that the wheels do not stray from their positions. And when moving in a 3-dimensional space, the resulting change in scale is hair-raising as each wheel size needs to adjust as well as the vehicle overall size!
Method three: Bryan in Kempston has proposed using a physical 1:18 scale driver upgrade to method 1 which then becomes both easiest and simplest to handle in final production, (but has all of the “delicacies” of chroma-keying outlined above). We will show great appreciation for a 3D driver model or for information leading to one — it seems difficult to find any reasonable military-style driver, those found so far have all been USA or aging civilians. Ideally it should resemble the Cadet clones, or at least the 1960’s uniform, of our Cadet Force series !
For ALL methods, we cannot find a better way to rotate wheels for animation than to use real rotation and film them. Maybe for a direct side shot we could create a digital rotation but, without some level of 3D graphics, the task of changing camera angle to the vehicle seems a hopeless endeavor. So our “wheel-rotation jig” is a critical tool for getting those wheels moving!
Final animation of the vehicle requires video control of the wheel turning speed compared to the “road” movement. In this respect, method 2 might seem easier as the wheel images are, and remain, completely independent of the vehicle body. However, with method one – which provides a single video stream of all turning wheels and at any angle – we end up with a single adjustment to give the correct ratio of wheel speed to movement. Thus the resulting mask from method 1 is much easier to handle at the full vehicle animation stage, because it is whole and includes the wheel rotation.
Wheel-rotation jig and simple cardboard blue-screen set-up (card from local print shop).